Wednesday, 29 July 2015

Pinhole Cameras - Experiment Two

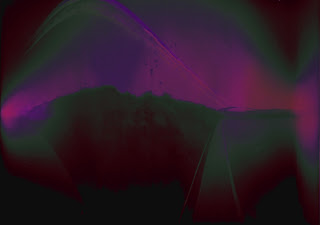
After the success of the first camera I decided to take a trip up to the second pinhole camera I had set up and see if it had worked. The first image is the original scan from the photographic paper straight from the camera. I was really excited to see that the image contained the light trail in the sky, which was what I had been hoping for after seeing some examples on other websites.


This is the image after the invert had been applied to the original, and it shows the light trail in the sky even more, and it has highlighted some of the details of the road which was really pleasing.

The next idea I had was to play with the photo editing software to see if I could alter the colours further using the hue and saturation settings, I also played with the brightness and contrast to see what other results I could get out of the image. I am pretty happy with the result, I was surprised with the colours in the sky that appeared, however, I did have to be careful when adding the editing so not to remove the details of the original image.


I am really excited about the results that I have been getting from the pinhole cameras, and these are only after 2 months of being up at the locations. I will be leaving the others out for longer. Fingers crossed they will still be there when I go to collect them! 

The original cameras are now reloaded with new paper and ready to go, along with 3 more that my son and I made earlier today. Just got to find some interesting locations!
Sunday, 19 July 2015

Pinhole Cameras Experiment One.....

It has been approximately 8 weeks since I put the first Pinhole Camera up at home as a test run to see if I had got the design right and whether the paper would work with the truly awesome weather we have in the North-West.

After taking down the camera, I realised that I needed to move fairly quickly to ensure that the scan was done swiftly so not to expose the image to much light in the transfer from the camera to the scanner. However, I discovered that getting the paper out of the can in one quick movement was not as easy as I thought it was going to be, and after a few frantic seconds I managed to place it soon the scanner, fingers crossed that I had not damaged the image. Upon placing the paper onto the scanner we realised (husband roped in at this point) that it did not want to scan without a preview first, big no, no when doing this kind of scanning. 


A quick changing of settings into "Professional" mode and we were off, with the scan taking the best part of 5 minutes as we put it on the highest settings to capture a decent image, and yes - the image is massive, 25% and it fills more than the whole of my screen.


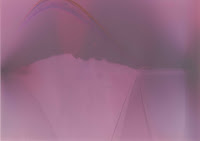
Here is the original scan:


We were both impressed with the detail that had been captured by the camera in the short space of time.


Here is the final image, it has been inverted so it gives the illusion that it has been processed, however, this is a much easier method than using all the chemical to actually develop the photograph paper. I am really looking forward to collecting the other cameras that we have put up, and I need to make some more. 

I am really happy with how this experiment has turned out, big smiley face, the adventure with Pinhole Cameras continues.......


Monday, 18 May 2015

Pinhole Cameras

A bit of a change from the usual Raspberry Pi related items, but something that I have become interested in over the last few months. At work the staff were given the opportunity to do the AS Photography course, as I keen photographer (pre-children) I decided it was a great opportunity to get my camera out again.

I have had lots of fun over the year collecting photos of different things and editing them to suit my needs for the AS course. My eldest son (who is 4) and I have had some lovely trips out to different places to take images to use, so much so, he has his own sketch book to keep his photos in.

I have now completed the assessments and work has been moderated so along with keeping my fingers crossed for my students, I am also hoping for a good grade myself. This has given me a bit of time to think about what I might like to do as the next unit to complete the A2 year of the course.

After much Internet searching and thinking about what I would like to try, I have decided to go back to basics and make my own cameras. In my search I cam across this website http://www.pinholephotography.org/

This has some really interesting stuff on it, and I had no idea how easy it would be to make a pinhole camera and set it up. After collecting the required items (the right photo paper being the most difficult to find) and asking my flyball team mates to keep hold of their empties for me to collect I was ready to make the cameras.


So with the video instructions written down and a good idea about how to create the basic camera I began.


Part way through and the lid is made, and all seems to be going well, I am winning the battle against the gaffa tape that wants to stick me to everything else in the house. And the battle with the children who keep running off with different items every time they visit the table to see what is going on. Loading the paper was interesting as I didn't want to expose it to much light, but as it is spending at least 6 month being exposed to the outside world a few seconds to get it in place in the can was not going to cause too much damage.


And here is the finished camera, all ready to roll. I am setting one up at home as my test one with others going up as I make them over the next few weeks. The idea is to catch a long exposure over 6 months with the paper recording the light movement to give some interesting results. It is a fantastic experiment as I have no idea what the images are going to turn out like as the camera is exposed 24/7 for 6 months tracking daylight and night time.

Here are the cameras set up in the test locations, fingers crossed that the one on the bridge does not get removed (I have put a note on it to explain what it is doing). The final challenge of setting up the cameras was to get them attached, I bought some super long cable ties, which were still not long enough unless I doubled them up and used a bit of string to keep it steady!


The idea for the project is to study long exposure photography using my own digital camera and comparing the results from the pinhole camera, using the same locations where possible. Fingers crossed....


Friday, 2 January 2015

Robots...and Soldering

After receiving a HapPi robot for Christmas it was time to really think about getting a soldering iron, or at least finding someone who had one. I should have known that my Dad had one set up on his workbench in his "man room", so a good start once I checked it out, just needed the time to get the robot controller out to assemble. This is far tricker than it sounds with 2 children running around and 3 dogs also running around, but on New Year's Day I managed to get some time to myself to sneak off and do some soldering.

At this point it should be mentioned that I don't think that I have soldered anything since my GCSE Design and Technology course - lets not discuss how long ago that was! So after setting up my work area, which consisted of moving all the random stuff off my Dad's desk to another part of the room, and piling a load of tools into a corner I was ready. I cautiously turned on the soldering iron and set a middle temperature, no luck as it was not hot enough to melt the solder so once it was turned up I was off. I decided quickly that I both like and dislike soldering, I like trying to make it all neat and tidy but not trying to rectify any mistakes that you makes as that is tricky. I discovered this as I soldered a hole shut by accident, after trying unsuccessfully to sort it out another pair of hands were required.

I am pretty pleased with my soldering, it is quite tidy - according to my Dad. So now comes the task of putting the body together, but I shall save that for another day.

Having a Raspberry Pi and going to Picademy has made me try lots of different things that I won't have come across. The students at school love having a go at Minecraft Pi and using Python to code different things - generally arming TNT and so on, trying out networking the Pis together and lots of other practical computing they otherwise would not have tried out.

Thursday, 11 December 2014

A soldering iron anyone....

I was given this the other day. Will have to go and root out a soldering iron though, the kids will love it once I have put it together.

I think I will try and add a button for the boys to play with it.


Wednesday, 22 October 2014

A bit late...

After wondering what to do for Open Evening, I decided on using the Raspberry Pis and demonstrating  Sonic Pi and using the Picamera with the GPIO pins to rig up a button. Great idea, but what about set up? Luckily I had my Sixth Form students last thing who helped me with putting the stations together, I had them try out Sonic Pi with the mini speakers and write a quick Python program to allow the cameras to take individual images all night and store them.

There was lots of interest in the Pis from both students and parents alike, with many asking about how to get one and what other things could be done on it. After the evening I had many positive comments of how impressed parents were with the use of the Pis. Roll on buying the next set so we can run full Raspberry Pi classes!

Tuesday, 23 September 2014

Raspberry Pi in School

A bit late on posting this but better than never. As the Sixth Form have to look into networking I decided to get out the Pis to get the students to have a go at setting a static IP address and then using the chat program to send messages to each other. A nice intro into how networking works, well we had some fun getting it all to work correctly and then playing with the code to make it do other things. It also brought up more questions about how to get more Pis to link together and how to share documents and so on.


The class then moved onto hooking up some buttons and LEDs, along with the buzzer! To look at the client and server working together, this caused far more entertainment with the changing of the code to make the hardware do a whole set of different things. Raspberry Pis have been a hit, every lesson they want to do something on them, and I am getting project ideas for their coursework based what they could do with the Pi.